Showing posts with label Easter. Show all posts

Tuesday, April 19, 2011

Tutorial Tuesday & Linky Party - Ruffles & Burlap Easter Basket (and a cute little boho bunny too!)

Good morning everyone! We are entering the countdown to Easter! All those last minute projects have about 5 days to get wrapped up or they're going back into the closet for next year. At least that's what I keep telling myself! Luckily, I think I've got the last of my Easter projects here to share with you today.

Baby A's Burlap Easter basket and Boho Bunny!


This is kind of a two-fer this week, but I can only take full credit for the basket. I found the tutorial for this adorable little bunny HERE at The Quilted Cupcake {complete with instructions and downloadable pattern}, I just tweaked it a bit to fit my style. :)


This little cutie is made with smooth minky fabric in brown and pink paisley. I just LOVE this stuff! I ordered it a few weeks ago from fabric.com for like $2.99 a yard! Crazy! Anyway, I thought for Baby A's first Easter she should have a mommy-made bunny for her basket. I call him the "Boho Bunny" since he's sporting the awesome paisley print. ;)

Of course, she also needed a basket. Duh! However, every place I've been lately has been hugely disappointing in the cute basket department so I decided I would make that  too. It wasn't too bad, just lots of measuring and cutting. But what a great outcome!


Here's what you need:

Cardboard box {or cardboard pieces}
Burlap
Fabric {optional}
Ribbon {optional}
Glue gun
Scissors

The measurements for this project will be dependent on what size basket you want to end up with. I scoured my kitchen until I found this bowl that I thought would be the perfect size for an Easter basket. I traced it onto the large side of my cardboard box and cut it out with my scissors.
Then, I measured the circumference of my cut circle and cut 2 strips of cardboard to wrap around it. Carefully, glue each edge down to the side of the cardboard. While that's drying, measure, cut, and get your burlap pieces ready for covering!
Just be sure to tuck in all the loose edges and use plenty of glue. I used a pen cap to shove all the little corners in and make everything nice and neat. The glue also helps with the pesky way burlap seems to shed all the time, so that's a plus too!

Next, decide if you want extra embellishments {the possibilities are endless!}...

I just hemmed and ruffled some pretty striped fabric that I've been stashing away and glued it over some coordinating ribbon. If I was any good at making fabric flowers, I would totally do that too, haha!

Once everything is in place, attach your handle behind the ribbon and you're finished!

.......

Now, in case you missed yesterday's edition of Merchandise Monday all about the sensation that is Scentsy, be sure to click over here to check it out! 
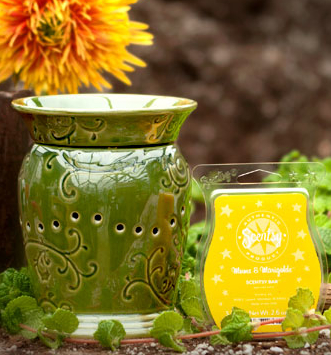

There's a ROCKIN' Scentsy giveaway, and you can also read my personal review of the Scentsy product line, and enter for your chance to win a $30 gift certificate for the warmer 
and scents of your choice! {or anything else you want from their awesome catalog!}
.......

OK! Now it's time for YOU to link up! Show me what you've been working on and I'll pick my favorites to showcase on this week's Saturday Linky Favorites!

Grab yourself a button to share the love for the party, and please link directly to the project post so they're easy for me to find when I come visit. :) Ok, GO!


XOXO


Sunday, April 10, 2011

Linky Party Features... The Easter Edition!

Holy cow, Easter is literally 2 weeks away!! Where has the time gone??

Ok, let's get real. There are just TOO many cute Easter posts happening right now in blog land. I personally love them all... Easter was always one of my favorite times as a kiddo. Probably all the bright colors, pretty dresses and candy! In any case, I wanted to take a moment to share some fun posts from the past couple of Tutorial Tuesday Linky Parties that are inspired by... you guessed it! EASTER!


560aacc


Such festive decor!! Thank you all for linking up, and I may just do another Easter post
if you guys keep showering our link party with such awesome ideas!

Feel free to grab yourself a button if you were featured!


Have a great week!


XOXO

Tuesday, March 29, 2011

Tutorial Tuesday & Linky Party - My Super Cheap Easter Mantle!!

Yay for Tuesday! Before I get all happy and excited to show off my Easter decor, I have to gripe a minute about my SD card. I think it hates me. I work so hard on all these projects, and diligently take pictures throughout the whole process, only to go in to download said pictures and find about 25% of them missing. Just gone. Poof! So... there are a few gaps here {again, sad face} but I'll do my best to fill in. Oh yeah, and I'm super late today because I was waiting around hoping for some good natural light to photograph in, but after 3 days of overcast weather... nada. So, missing pictures, check. Sucky pictures, check. Ok, done complaining, moving on!

I have never really been a holiday decorator. I mean, Christmas, yeah of course. But not much else. Hubby and I go all out in the outdoor foyer for Halloween, because it's fun for the trick-or-treaters, but this year I've been making an effort to step up my decorating. I'm hoping that by working on it now, building up some stock decorations, and holding myself accountable to show it off, that it will become 2nd nature to decorate for holidays by the time Baby A is big enough to enjoy it. :)

I have to admit, my Valentine's mantle was less than impressive, but I think I'm getting better now that Easter is rolling around...


What's extra fun about this mantle collection, is that I only spent about $5. YAY!

I found some more great stuff in the Target $1 bin:

Birdhouse: $1
{originally green and speckled}

Daisy Stakes: $1
{originally multi-colored}

Easter Egg Candle Holders:
Eggs: $.44
Wood Disks: 2/$1=$2
{originally unfinished wood}


Already had:

 Picture frame 
{was also from Target $1 like 2 years ago}

Russian Blown Glass Flower
{gift from a well-traveled friend! Love you Nessa!}

Rustic Chicken
{Hobby Lobby last season, if you want to get picky, he was $5 then, haha!}

Vintage Milk Bottle
{got from Mom's stash when she was cleaning out the house}

Felt Ruffle Wreath
{Christmas Project, 2010}

Flower Pot
{repurposed baby shower decoration}


So, I sort of have a bunch of mini-tutorials this week. :)

Flower Pot Topiary


Bird House - $1 Target find painted a robin's egg blue
Daisy Stakes - $1 Target find, painted yellow and white {was crazy multi-colored}
Flower Pot 2/$1 last summer @ Target, bought for baby shower, repurposed!
Moss - leftover from monogram project
Floral Foam cut to fit the flower pot
Ribbon scrap tied in a bow

So easy, and adds a little greenery too.

Easter Egg Candle Holders


I can't take credit for this idea. 
I saw this tutorial on The CSI Project, guest posted by Paula @ JC's Loft.
She has all kinds of pretty little Easter projects!


Ruffled Felt Wreath


You can see the original here in my Crafty Christmas post.
I just took this beauty, dressed it up with a little purple ribbon and added a silver monogram.
Perfect addition to the Easter Mantle!


No- Sew Spring Banner


This may have been the easiest part! 
All I did was take some bright fabric scraps, cut them into triangles 
with 6" tops and 7" sides, and hot glue them to some white, medium sized ric rac. 
Done!
P.S. I also hot glued them TO the brick. Easy to stick on, easy to take down, no mess!


So there you have it! I'm pretty proud of myself. I had no idea how much planning actually goes into getting all this stuff together to decorate with. But, it was worth it, and fun to boot!

What have YOU been working on? Any fun Spring crafts, or Easter inspired ideas? 
Link 'em up below and grab a button! 


I can't wait to see them. :) I'll be picking my favorite 5 to show off on Saturday.


XOXO


Related Posts Plugin for WordPress, Blogger...