Showing posts with label tutorial. Show all posts

Tuesday, October 2, 2012

Almond Flour Zucchini Bread for warm Fall bellies!


Good morning all! It seems as though Fall is slowly creeping into South Texas this month and I for one could not be happier! The Fall season has always been my favorite. It's not so much about one specific event (some people love Halloween, some love the start of football season...) but more of a feeling I get. There's a specific smell in the air, a fresh crispness that only Fall has, that always reminds me of home. It's all very nostalgic. ;)

Another thing that Fall invokes for me is a desire to bake. I'm not sure if it's the fact that turning on the oven no longer creates an unbearable heat wave in the house, or the fact that the smell of baked goods just seems suitable for the season. In any case, I love it and I'm excited to share my first Fall baking recipe with you!

This one I found through one of the many Paleo/cooking/healthy eating sites that I follow, and for the life of me I cannot find the original post or the site it came from. I will happily credit the creator if I can ever figure out who that was, promise!

I love this recipe for so many reasons: It's easy, it's grain free, gluten free, lactose free, and sugar free. And best of all, it tastes AH-MAZING so you'll never know the difference, especially when they're warm and slathered with a pat of butter.


Sorry this is not the best photo, but it's hard to get good pics when you're stuffing your face with this goodness. You can make these into loaves, but you know how much I love to use my muffin tin, so of course I made muffins. These little pre-portioned snacks are just so nice and portable too.

Ingredients (makes 2 mini loaves or 12 muffins)

1-1/2 cup blanched almond flour
2 teaspoons cinnamon
1 teaspoon baking soda
1/2 teaspoon salt
1/2 teaspoon nutmeg
3 eggs, beaten
1/4 cup honey
1 ripe banana
1 cup shredded, unpeeled zucchini
Directions
Preheat oven to 350 degrees Farenheit.
Combine the dry ingredients in a small bowl.
Place the wet ingredients in the bowl of a stand mixer, then beat on medium for 1-2 minutes until frothy and fully combined. Add the zucchini and beat again just enough to incorporate.
Slowly add the dry ingredients with the mixer running, until all of the flour mixture has been incorporated.
Spoon the batter into 2 mini loaf pans. You can also use this batter to make muffins.
Bake for 30-35 minutes until the middle is set and a toothpick comes out clean.

*A note about almond flour: They are all different, and each one will turn out a different color and texture of bread. If you're going for a lighter, slightly fluffier bread I would stick to something super fine and blanched like this from Digestive Wellness. If you're not so picky, you can totally use something like Bob's Redmill Almond Meal/Flour which you can find at some grocery stores, and pretty much any health food store.

Next time, I think I'll substitute pumpkin for the zucchini. While I loved the zucchini, my hubby was able to spot the "vegetables in my muffins," so the kiddos might too. Plus, who doesn't love pumpkin in Fall baking??

Have a great week!!

XOXO

Monday, October 17, 2011

Tutorial Tuesday & Linky Party - Ruffled Fall Hand Towels for Under $2

Hello there lovely bloggers! 

So, you guys know I have been like crazy busy lately, working on my big order. Since I'm still trying to squeeze in projects where I can (if only to keep my sanity!!), I thought I would resurrect a tutorial from the past. Of course, I re-made the project to be a little more "Fall-ish" and to show you that I'm not cheating over here, haha!

My all-time most viewed tutorial is...


What do you think? Pretty cute huh? Not your "traditional" fall decor, but somehow it just feels right. 
I don't know what it is about these towels, but people love them. They're inexpensive to make, super duper easy, and totally customizable depending on what you have laying around in your scrap pile.
 Okay... so I see why it's #1. ;)


Ready for the tutorial??

~ Dressed Up Hand Towels ~

Wal*Mart, 2 pack, $1.68. 
SCORE!

My fabric was a little scrap left over from a jelly roll, ribbon was a scrap from my white felt wreath, and the lace stuff a scrap from a ribbon scrap pack I bought at Hobby Lobby ages ago. You don't need much of anything to do this project, these particular towels are only 15" wide to give you an idea.

First, lay your pieces out across the short side of your towel to make sure they are long enough with a bit leftover at each end to fold under and hem. I left about an inch on each end.

{UPDATE: If you're doing the ruffled version like my new set, use about twice the length of fabric as I mentioned above, so that you have plenty of ruffle room. Just run the top edge of the strip through your sewing machine on the longest stitch length, and it will ruffle right up before your eyes.}


I started with my fabric since I knew I wanted it on the bottom. I planned to sew the ribbon and the lace over the top of the raw edges of the fabric so I wouldn't have to do any more hemming than necessary.

I folded under and pinned the edges down first, then used the wonky little zig-zag stitch 
to attach it to the towel. Clean edges, pretty little ziggy zaggy.

{UPDATE: no need to baste down the sides of the fabric if you're using a ruffle... 
just tack it down along the top edge of the ruffle and let it ruffle away at the edges.}

Next, I pinned and basted down the long edges. I know I'm going to be attaching the ribbon and lace 
over the fabric, so I mostly just need it to stay down and in place. The real reinforcing will come later.


Now more pinning for the lace...
{Seriously, what is that stuff? I have no idea what to call it, so I'm just going with lace for now.}
And again with the wonky zig zag stitch to make sure this stays in place and can be machine washed.


I did the same thing for the ribbon on top that I did for the fabric: 
Pinned and basted on both the top and bottom long edge. 
Somehow I managed to miss taking the pic on this one so you'll just have to use your imagination, haha!

Iron out any wrinkles, and ta-da! Pretty little dish towel!


They're SO easy, and you already have an extra towel, so why not make it a pair?


 Two is better than one anyway, I think. :)


Since I made these two, I've been digging around in my scrap box for other coordinating colors to make more. I could seriously solve my entire house-wide towel problem with what I find in my scrap box. :) 
But wouldn't they make great gifts? Housewarming parties, hostess gifts, wedding shower, holidays... 

I'm so excited that our little linky party is growing so large. Thanks to you all for participating and spreading the word!! Grab yourself a button if you're linking up this week, and you can find all the parties I'll be linking up to this week up top under the "linky parties!" tab. There's lots of great spots on that list so definitely go check them out, and let me know if you have a party that I can add to my list!

Now it's your turn! 
Link up your projects below, and grab a button for your project post. 
Be sure to visit other links on the list and share the love! :)
Today's Creative Blog

Have a great week!!

XOXO


Tuesday, September 27, 2011

Tutorial Tuesday & Linky Party - DIY Maxi Dress

Good morning, bloggers! I have a really awesome tutorial to share with you today. I know you're going to be shocked, but it's not something baby-related! It's a full grown sewing project, it's super fast, WAY cheap, and easy enough for anyone to do.

The DIY Maxi Dress


Now, I don't know about you guys but I have had the hardest time letting of my maternity tank tops. I love them. For me, it's comfort and coverage. Being rather, how should I say this... "top heavy" I have always struggled to find tops that can accommodate the load, lol, and offer me some decent coverage without showing my bra straps. Until I got pregnant, I just assumed I would never find this magic tank. Then came the world of maternity clothing. I can't really wear any of it anymore as it all looks funny, but I just couldn't let go of the tanks. So I decided to modify! :)

What makes this project so easy is the fact that you're using an already constructed shirt. No arm holes to sew, no serious measurements, and no trying to pin while wearing. Nice. :)

Materials List
  1. Tank top or t-shirt that fits you well. 
  2. 1 full yard (at least) of coordinating fabric. I used a jersey knit so it's stretchy and forgiving. ;)
    • A note on the skirt fabric: I used an entire yard because I planned to ruffle it to give the dress some fullness and movement, and not have it be too fitted. You can use more or less as you like, and as measurements allow. 
  3. Coordinating thread. Though it can really be any color because it doesn't show.
  4. The usual suspects: sewing machine, scissors, measuring tape
Here we go... Photos reflect instructions from left to right and top to bottom.


Tutorial Instructions:
  1. Choose your shirt and fabric.
  2. Try on your shirt and make a mark where you want your skirt to start. Then draw a guide line across the shirt and cut through, removing the bottom half.
  3. Since we're using the entire yard, fold the long sides of your fabric together and hem together to make a giant tube. I used a regular running stitch twice, and then serged the ends together for extra sturdiness. You can also use a zig-zag stitch in place of serging.
  4. Next, decide which end of the tube will be your at your waist, and sew a single line all the way around, being careful not to overlap at the seam. Pull the ends of the thread to ruffle until it fits your waist measurement.
  5. Now, turn your tube inside out (if it's not already), and put your tank inside the tube with the right sides facing each other and the open ends matched up. Pin together securely.
  6. Sew together the tank and fabric tube. You can probably use just about any stitch for this, but I used my #9 which is like a slanted zig-zag stitch. This stitch will give you a little stretch, which is good when dealing with knits and jersey fabric.
  7. You can see the finished #9 hem in box #7. Now trim your threads, and any errant fabric.
  8. Turn right side out and inspect your hems.
  9. You can hang and measure for a bottom hem, but it's not necessary. I didn't because for one, jersey doesn't fray so it doesn't need a hem, and secondly, I have such long legs that my whole yard was just about the right length to hit my toes. When it comes to dresses, I like 'em long and swishy!
And that's it! You're finished! How easy was that? Now have fun dressing it up, or wearing it plain... there's nothing this fun maxi dress can't do. 

Now it's your turn! Link up your projects below for this week's linky party!

Linky Guidelines:
  1. Please feel free to link up as many projects as you would like!
  2. Please link directly to your project post, it makes them much easier for everyone to find.
  3. Please no etsy shops, or generic blog links. Specific posts links only.
  4. Visit someone else's link and share the bloggy love!
  5. Grab yourself a button and post it in your project post or on your blog. Optional of course, but the more we share the party, the more people see your posts! :)
  6. Have fun!!
Have a great week!!

XOXO


Tuesday, August 30, 2011

Tutorial Tuesday - The Cutest Clutch in Town!

Good morning everyone! It's time for another edition of Tutorial Tuesday, complete with linky party fun!

I did {another} sewing project this week. I hope you guys are not getting too tired of the sewing tutorials, I am really coming into my own with my machine and I'm just so excited to try all these new projects. This week I jumped even further out of my comfort zone and tacked the oh-so-scary ZIPPER!!!

I know, just thinking about it used to make me cringe. Now, not so much. I'm excited about all the new projects I can do now with my new zipper skillz. {That's right, I spelled it with a z... because that's how mad my skills are. ;)} What do you think? Introducing...

The Cutest Clutch in Town
{a.k.a. The Aviary Clutch}


A friend and I were talking the other day when Joel Dewberry's Aviary 2 collection came up. It inspired me to pull out my little Aviary 2 stash and make myself something lovely. :) I'm a sucker for purple, and turquoise is currently holding 2nd in that poll, so this collection is right up my alley.

I found the tutorial on the Noodlehead blog, so you can pop over there to check out the details, but I made some adjustments so give you a quick rundown here, too. :)

Here's what you need:


Materials List:

1. Fabrics of choice- I used 4 different fabrics, but you can use as few as two.

  • Main front fabric: one 5.5" tall by 9" wide, and one 5.5" tall by 13" wide (the longer piece will be the gathered/ruffled front)
  • Front band: one piece 4" tall by 9" wide.
  • Lining: two pieces 5.5" tall by 9" wide
  • Zipper end covers: two pieces 1.5" tall by 2.5" wide.
  • Medium weight fusible interfacing: (2) 5.5" tall by 9" wide (for fusing to inside of exterior pieces of clutch)
{Optional Pieces}
  • Divider pocket: one piece 8" tall by 9" wide (apply interfacing to half, you'll need a 4" x 9" piece)
  • Card holders: one piece 7" tall by 9" wide (apply interfacing to half, you'll need a 3.5" x 9" piece)
  • Cash pocket: one piece 5" tall by 9" wide (apply interfacing to half, you'll need a 2.5" x9" piece)
2. Zipper. Can be longer and cut down, but finished size will need to be 8.5" long

3. Medium weight fusible Interfacing (see above for measurement details)

4. Coordinating thread

Now as far as the basic pattern goes, I followed the Noodlehead tutorial pretty much to a T. And she's got some great pics to go along with the steps too.

I took some liberties when it came to the inside. I like pockets in my wallet/purse so I had to make some.

I took the large "divider" piece (folded over and fused), and top stitched about 1/4" from the folded edge then top stitched another row 1/4" below that. Next, I basted the sides of the piece to one side of the lining.

Next, I took the 7"x9" piece folded it over and fused it together and top stitched it the same way as the first piece. I then basted the ends to the other piece of lining. 

This is where it gets personal. ;) Depending on what you're going to be using the pockets for, the measurements for the stitching will be different. I wanted to have credit card pockets, a pocket for my business cards, and a pocket to hold my chap stick so I used each of those things to help me measure off the sections.

I also added a shorter pocket in front of the larger set of pockets for stowing cash in. That's the 5"x9" piece, just fold it in half and fuse it the same way as the others and sew it on in front of your first set of pockets.

Just to make myself feel good, I also sewed in one of my tags. You know, so it's custom. ;)

Finish following the Noodlehead tutorial and you should be all set!!


Tips for this Tutorial:
  • When sewing together your lining, leave a larger seam allowance than you did when sewing together your outside pieces. (ex. 1/4" seam allowance on outside pieces, 3/4" seam allowance on lining.) This just helps the lining and pockets fit nicely into the clutch without bunching up.
  • If I were doing this project again, I would make the front ruffled part 5.5" x 15" instead of 13" so I could have better ruffles. Who doesn't like more ruffles? ;)
  • Mix up your fabrics for a truly unique piece!


So now it's your turn! 
Link up your projects below, and grab a button for your project post. 
Be sure to visit other links on the list and share the love! :)
Today's Creative Blog

Have a great week!!
XOXO


Friday, July 15, 2011

Friday Features: Sewing Projects

Hi all!! I've been meaning to get in here and show off some of the great things that you all have been sharing on the Tutorial Tuesday linky party. Since I didn't do a post this week, I left last week's party open {it will be open until Monday night, so go ahead and link up your projects!} and there's all kinds of fun stuff going on over there.

There are so many great links, that I thought I would narrow it down into groups. This Feature Friday is focusing on all the great sewing projects linked up this week. Check them out...

{isn't she cute? I can totally appreciate a person who like to take silly pictures!}

{you guys know I'm a sucker for onesies!}

{such a clever idea her daughter had here!!}

{Love ruffles, love a repurpose, LOVE this little cutie!}

{she made her own pattern... which is like, amazing to me!}

{what an adorable skirt, and an even more adorable model! Look at her hamming it up!}

And last but definitely not least...
{Congrats to Sarah on her brand new little angel! She is just too sweet!!}

I hope you all are having a fantastic week and have something fun planned for the weekend!

XOXO


Saturday, April 16, 2011

Saturday linky party Favorites!

Another lovely link party this week! 
Here are some of my favorites... Seriously, this gets better and better! 
You guys are SO incredibly talented!


AMAZING posts this week everyone!! 
Thanks so much for linking up, I can't wait to see what you've got for us next week!! 
Enjoy the rest of your weekend and we'll see you on Monday for a brand new giveaway!! :)


XOXO

Monday, April 11, 2011

Making Your Own Tags & A WINNER!


Happy Monday Everyone! I hope you all had a wonderful, stress-free weekend and are ready for a fun week ahead! I'm sure you're all anxious to see who our OceanBelle Tree of Hope winner is, so let's not waste any time!

Thanks to random.org for choosing....
And our winner is...


#10, Kelli
Who said...


Congrats, Kelli! Shoot me an email in the next 48 hours to claim your prize!

Now on to the Monday fun!

I've seen lots of talk going on in blog land, on facebook, and in the etsy forums about product labels. I'm not talking about CIPSA regulation stuff, but something cute and easy to put on your products to really make them your own. I had been thinking about it quite some time when I came across this:


Sew-In, colorfast, printable fabric sheets! Perfect! I'm always a sucker for doing it yourself!! Only $8.99 per pack at Hobby Lobby, and with your trusty online 40% off coupon, like $5. Pretty good for all the labels you can get out of this package! I think I got like 70 labels from one sheet alone.

There are instructions on the package, but I'll go ahead and roll through them so you can see just how easy it was to do this little project...

First you're going to want to design your image on the computer. You can use whatever software you're comfortable in. I used pixlr {free online illustrator software} to design the logo and then imported it into a Word document so I could format the logo into an 8x12" printable format.

Each sheet is white, so keep that in mind when designing your logo to be printed onto the page. Also, probably not a bad idea to print a test page just to make sure everything is lined up properly and you have enough room to cut between the tags. PRINT.

Once your sheet is finished printing, let it dry and peel the paper backing from the fabric.
{Here comes the weird part...}
In order to make your design colorfast, you must rinse fabric gently in cold water. Lay flat to dry and dab excess moisture with a cry towel.


See? Easy. Now iron over your fabric using the highest setting possible. TA-DA! Done.

Now, just take your rotary cutter and go to town until you have a whooooole bunch of little taggies. Then, sew them on to your {whatever you make} and you have a fully branded piece of merchandise.

{forgive the terrible stiching here... I was having a little disagreement with my machine tension, haha!}
Now, of course you can always order yourself some fancy, pre-folded satin labels in an array of colors from any of about a million online shops. I know this. I also know that costs alot, and in most cases you don't get to see the actual finished product until it ships to you. This is just a quick and easy, low-commitment alternative that only costs around 2 cents per label.

Thanks again to Brandy at OceanBelle for sponsoring our latest giveaway! Those of you who didn't win today and would like to purchase from her shop can find a link to OceanBelle in my sidebar!

See ya tomorrow for another tutorial and linky party!!

XOXO


***want to sponsor a giveaway at The Little Birdie? Email me! I would love to feature your shop!***
***have a question you would like adressed on Merchandise Monday? Email me!***

Sunday, April 10, 2011

Linky Party Features... The Easter Edition!

Holy cow, Easter is literally 2 weeks away!! Where has the time gone??

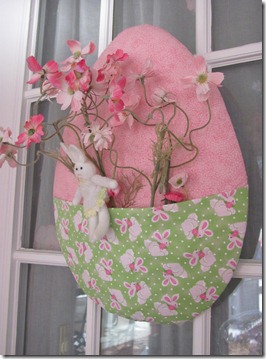
Ok, let's get real. There are just TOO many cute Easter posts happening right now in blog land. I personally love them all... Easter was always one of my favorite times as a kiddo. Probably all the bright colors, pretty dresses and candy! In any case, I wanted to take a moment to share some fun posts from the past couple of Tutorial Tuesday Linky Parties that are inspired by... you guessed it! EASTER!


560aacc


Such festive decor!! Thank you all for linking up, and I may just do another Easter post
if you guys keep showering our link party with such awesome ideas!

Feel free to grab yourself a button if you were featured!


Have a great week!


XOXO

Related Posts Plugin for WordPress, Blogger...